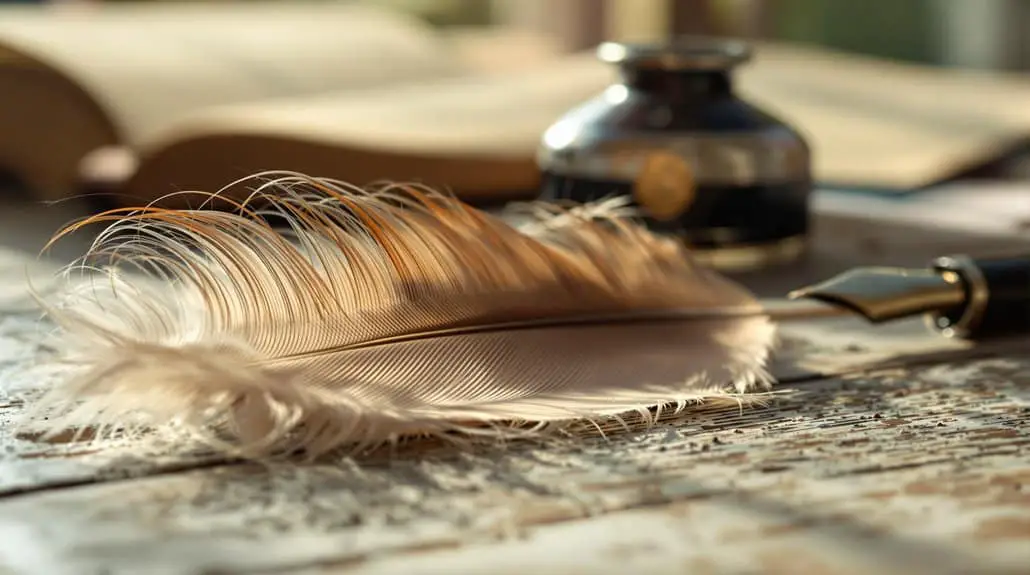
How to Make a Feather Pen
You’ll need a large turkey or goose feather, an X-acto knife, and more patience than assembling IKEA furniture. Soak the feather, heat it in sand to straighten it, then carefully carve the tip into a nib—basically turning nature’s flight equipment into your writing tool. Cut a small slit for ink flow and whittle the point flat, or you’ll splatter ink like a toddler with finger paint. Master these steps and you’ll discover why humans invented ballpoint pens.
Key Takeaways
- Select large turkey or goose feathers and soak them in water to soften before heating in sand to straighten the shaft.
- Cut both ends of the feather cleanly and narrow the shaft toward the tip for comfortable grip and proper ink flow.
- Create a small slit in the nib and sculpt the tip into a fine, flat point using an X-acto knife.
- Test ink flow frequently while making tiny adjustments to ensure the nib isn’t too thin and prevents ink splatters.
- Hold the pen at an angle with gentle pressure when writing and keep an inkwell nearby for frequent dipping.
While you might think making a feather pen is as simple as plucking a feather and dipping it in ink, you’re in for a surprise. The actual process requires more steps than assembling IKEA furniture, and that’s saying something.
First, you’ll need to raid a turkey farm or befriend some geese. Large feathers with strong, straight shafts work best. And before you ask, no, that pigeon feather from your windowsill won’t cut it. You’ll also need an X-acto knife, an inkwell, and a flat workspace that you don’t mind potentially destroying.
Here’s where it gets weird. You’ve got to soak your feather in water like you’re giving it a spa treatment. Then – and I’m not making this up – you heat it in sand. Yes, sand. Apparently, medieval scribes were onto something with their bizarre feather-cooking methods. This supposedly straightens the shaft and makes it more pliable.
Once your feather’s had its beach vacation, you clean out the inside debris. Because nothing says “refined writing instrument” like gutting a bird appendage. Let it dry completely, then decide whether to trim those fluffy barbs. Some people leave them for the aesthetic. Others think they’re annoying. Your call. The key is to clear off enough ribbing to create a comfortable grip where your fingers naturally rest.
Now comes the surgery. Cut the top and bottom of the feather to create clean edges. Keep it symmetrical unless you want ink flowing like a broken faucet. Hold the quill how you’d actually write with it – revolutionary concept, I know – and start narrowing the shaft toward what’ll become your nib.
Creating the nib is where most people mess up. You need to cut a slit for ink flow, then sculpt the tip into a fine point. But here’s the kicker: you can’t just hack away at it. You’ve got to whittle gradually, keeping everything even. Make it too thin? Congratulations, you’ve created an expensive toothpick.
The tip needs careful attention. Remove just the very end to guarantee smooth writing. Keep it flat, or you’ll be Jackson Pollock-ing your paper with ink splatters. Test the flow constantly. If it’s not working, make tiny adjustments. Emphasis on tiny.
When you finally use this thing, hold it at an angle and apply gentle pressure. Too much force and you’ll split the nib faster than you can say “why didn’t I just buy a ballpoint.” Keep your inkwell close because you’ll be dipping constantly. Choose smooth paper unless you enjoy the sensation of dragging sandpaper across silk.